AMD APU Passthrough to a Proxmox LXC for Local AI
Step-by-step guide to successfully passing your AMD APU through to an LXC container and deploying a hardware-accelerated AI stack with Ollama and Open WebUI.
Running local Large Language Models (LLMs) on a CPU is slow. If your homelab server has an AMD Ryzen APU, you can use that integrated GPU to speed up inference.
Running everything inside a lightweight Proxmox LXC container instead of a full VM saves resources. However, unprivileged container permissions and AMD driver quirks often break the setup.
My hardware:
- CPU: AMD Ryzen 5 4600G with Radeon Graphics (1 Socket)
- Memory: 128GB
- OS: Proxmox Virtual Environment 9.1.6
This is for testing, learning, and self-hosting lightweight models on homelab hardware, not building a massive AI workstation.
Here is how to pass your AMD APU through to an LXC container, install Docker, and deploy a hardware-accelerated AI stack with Ollama and Open WebUI.
Phase 1: Prepare the Proxmox Host
All commands in this phase must be run on the Proxmox Host shell (root@pve1).
1. Install AMD Firmware (The Non-Free Repository)
Proxmox (based on Debian) doesn’t include the required AMD graphics firmware by default. We need to enable the non-free firmware repositories to install the package.
1
nano /etc/apt/sources.list
Ensure your primary Debian repository lines include non-free and non-free-firmware. It should look something like this:
1
2
3
deb http://deb.debian.org/debian trixie main contrib non-free non-free-firmware
deb http://security.debian.org/debian-security trixie-security main contrib non-free non-free-firmware
deb http://deb.debian.org/debian trixie-updates main contrib non-free non-free-firmware
(Note: If you are on an older version of Proxmox, replace trixie with bookworm).
Update your packages and install the firmware:
1
2
apt update
apt install -y firmware-amd-graphics
2. Configure GRUB for IOMMU
First, enable IOMMU so the host can access the GPU hardware directly.
1
nano /etc/default/grub
Modify the GRUB_CMDLINE_LINUX_DEFAULT line to look exactly like this (remove any video=efifb:off or nomodeset flags if they exist):
1
GRUB_CMDLINE_LINUX_DEFAULT="quiet amd_iommu=on iommu=pt"
Update GRUB to apply:
1
update-grub
3. Disable VFIO “Hijacking”
If you’ve previously set up VM passthrough, you might have blacklisted the GPU drivers. We need the host to use them for LXC.
1
nano /etc/modprobe.d/vfio.conf
Comment out (add # to the start) every line so it looks like this:
1
2
3
# options vfio-pci ids=1002:1636...
# softdep amdgpu pre: vfio-pci
# softdep snd_hda_intel pre: vfio-pci
4. Force the amdgpu Module to Load
Ensure the host loads the AMD drivers at boot.
1
nano /etc/modules
Add these lines to the bottom:
1
2
3
4
5
vfio
vfio_iommu_type1
vfio_pci
vfio_virqfd
amdgpu
5. Check for Hidden AMD Blacklists
Before rebooting, ensure Proxmox isn’t actively blocking the driver. Run the following check:
1
grep -ir "amdgpu" /etc/modprobe.d/
If you see a file like blacklist-amdgpu.conf, you will need to rename it, or the driver will never load regardless of your configuration in /etc/modules:
1
mv /etc/modprobe.d/blacklist-amdgpu.conf /etc/modprobe.d/blacklist-amdgpu.conf.bak
6. Apply Changes and Reboot
Regenerate the boot images and restart your Proxmox server.
1
2
update-initramfs -u -k all
reboot
7. Verify the Drivers Loaded
Once the host is back up, check for the GPU device files:
1
ls -l /dev/dri
You should see card0 and renderD128.
Phase 2: Fix Container Permissions (The Udev Fix)
By default, unprivileged LXC containers map the root user to a high-numbered “nobody” user on the host. If you pass the GPU through now, the container will be denied access. We fix this with a Udev rule on the host.
Run this on the Proxmox Host:
1
2
3
4
5
6
# Create the rule to make the GPU globally readable/writable
echo 'KERNEL=="renderD128", MODE="0666"' > /etc/udev/rules.d/99-render.rules
echo 'KERNEL=="card0", MODE="0666"' >> /etc/udev/rules.d/99-render.rules

# Apply the rule immediately
udevadm control --reload-rules && udevadm trigger
Verify the permissions changed (look for crw-rw-rw-):
1
ls -l /dev/dri/renderD128
Phase 3: Create and Configure the LXC Container
1. Provision the Container
Create a new unprivileged LXC container using the Proxmox CLI. For the AI stack, Ubuntu 24.04 is the recommended template. First, update your template cache and download the image:
1
2
pveam update
pveam download local ubuntu-24.04-standard_24.04-2_amd64.tar.zst
Create the container (we use ID 100 as an example), assigning 4 CPU cores, 4GB of RAM, and 30GB of storage:
1
2
3
4
5
6
7
8
pct create 100 local:vztmpl/ubuntu-24.04-standard_24.04-2_amd64.tar.zst \
  --unprivileged 1 \
  --hostname local-ai \
  --cores 6 \
  --memory 49152 \
  --swap 0 \
  --rootfs local-lvm:30 \
  --net0 name=eth0,bridge=vmbr0,ip=10.1.99.16/16,gw=10.1.0.1,tag=99
Do not start the container yet.
2. Get Host Group IDs (Optional)
Since the Udev rule from Phase 2 makes the GPU world-writable (0666), matching group IDs isn’t strictly necessary for the container to boot. However, keeping them aligned remains a solid structural best practice. Find the IDs for the render and video groups on your host:
1
2
getent group render | cut -d: -f3  # Example: 104
getent group video | cut -d: -f3   # Example: 44
3. Enable LXC Nesting
In the Proxmox Web UI, select your container -> Options -> Features. Check the box for Nesting. This is mandatory for running Docker inside LXC.
4. Edit the LXC Config
Find your container ID (e.g., 100). Edit its configuration file on the Host:
1
nano /etc/pve/lxc/100.conf
Append the following lines to pass the hardware through (update the GIDs if yours differed from 104 and 44):
1
2
3
4
5
# GPU Passthrough
lxc.cgroup2.devices.allow: c 226:0 rwm
lxc.cgroup2.devices.allow: c 226:128 rwm
lxc.mount.entry: /dev/dri/card0 dev/dri/card0 none bind,optional,create=file
lxc.mount.entry: /dev/dri/renderD128 dev/dri/renderD128 none bind,optional,create=file
Start (or restart) your LXC container.
Phase 4: Deploying Ollama and Open WebUI with Docker Compose
Running discrete containers requires multiple commands and makes networking fragile. We define the AI stack using Docker Compose instead.
Log into your LXC container console (pct enter 100 or SSH).
1. Install Docker
First, grab the official script to install Docker (which includes the Compose plugin) on your fresh Ubuntu container:
1
2
apt update && apt upgrade -y
curl -fsSL https://get.docker.com | sh
2. Define the Stack Configuration
Create a new directory for the AI services and write the docker-compose.yml file:
1
2
mkdir -p ~/ai-stack && cd ~/ai-stack
nano docker-compose.yml
Paste the following YAML into the file:
1
2
3
4
5
6
7
8
9
10
11
12
13
14
15
16
17
18
19
20
21
22
23
24
25
26
27
28
29
30
31
32
33
34
35
36
37
38
39
40
41
42
43
44
45
46
47
48
49
50
51
52
53
54
55
56
57
58
59
60
61
62
63
64
65
66
67
68
69
70
71
72
73
74
75
76
77
78
79
80
81
82
83
84
85
86
87
88
89
90
91
92
93
94
95
96
97
98
99
100
101
102
103
104
105
106
107
108
109
110
111
112
113
114
115
116
117
118
119
120
121
122
123
124
125
126
127
services:
  # -------------------------------------
  # 1. Reverse Proxy (Traefik)
  # -------------------------------------
  traefik:
    image: traefik:v3.0
    container_name: traefik
    restart: unless-stopped
    command:
      - "--api.insecure=true" # Enables the Traefik dashboard on port 8080 (optional)
      - "--providers.docker=true"
      - "--providers.docker.exposedbydefault=false" # Security: deny mapping unless explicitly labeled
      # Define both HTTP (80) and HTTPS (443) entrypoints
      - "--entrypoints.web.address=:80"
      - "--entrypoints.websecure.address=:443"
      # Automatically redirect all HTTP traffic to HTTPS (websecure)
      - "--entrypoints.web.http.redirections.entrypoint.to=websecure"
      - "--entrypoints.web.http.redirections.entrypoint.scheme=https"
    ports:
      - "80:80"       # Standard HTTP entrypoint
      - "443:443"     # Secure HTTPS entrypoint
      - "8080:8080"   # Traefik Dashboard
    volumes:
      - "/var/run/docker.sock:/var/run/docker.sock:ro" # Secure read-only access to Docker events
    networks:
      - proxy-net
    logging:
      driver: "json-file"
      options:
        max-size: "10m"
        max-file: "3"

  # -------------------------------------
  # 2. LLM Backend (Ollama)
  # -------------------------------------
  ollama:
    image: ollama/ollama:latest
    container_name: ollama
    restart: unless-stopped
    user: "root"        # Force hardware permissions
    privileged: true    # Bypass Docker AppArmor blocking IO controls to /dev/dri
    networks:
      - ai-net
    devices:
      - /dev/dri:/dev/dri
    volumes:
      - ollama_data:/root/.ollama
    environment:
      - OLLAMA_HOST=0.0.0.0
      - OLLAMA_VULKAN=1
    healthcheck:
      test: ["CMD", "ollama", "list"]
      interval: 10s
      timeout: 5s
      retries: 5
      start_period: 15s
    deploy:
      resources:
        limits:
          memory: 48G
    logging:
      driver: "json-file"
      options:
        max-size: "20m"
        max-file: "3"

  # -------------------------------------
  # 3. Frontend UI (Open-WebUI)
  # -------------------------------------
  open-webui:
    image: ghcr.io/open-webui/open-webui:main
    container_name: open-webui
    restart: unless-stopped
    networks:
      - ai-net     # Internal network to reach Ollama
      - proxy-net  # Edge network facing Traefik
    volumes:
      - open_webui_data:/app/backend/data
    environment:
      - OLLAMA_BASE_URL=http://ollama:11434
    depends_on:
      ollama:
        condition: service_healthy # Will not try to start before Ollama's API responds
    # Principle of Least Privilege
    cap_drop:
      - ALL
    deploy:
      resources:
        limits:
          memory: 2G
    logging:
      driver: "json-file"
      options:
        max-size: "10m"
        max-file: "3"
    labels:
      - "traefik.enable=true"
      # Tell Traefik exactly which network to use to reach this container!
      - "traefik.docker.network=ai-stack_proxy-net"

      # Catch-all rule: Allows ANY IP or domain to reach Open-WebUI
      - "traefik.http.routers.openwebui.rule=PathPrefix(`/`)"

      # Route traffic through HTTPS and generate a self-signed certificate
      - "traefik.http.routers.openwebui.entrypoints=websecure"
      - "traefik.http.routers.openwebui.tls=true"

      - "traefik.http.services.openwebui.loadbalancer.server.port=8080"

      # Traefik Security Middleware
      - "traefik.http.middlewares.secure-headers.headers.browserXssFilter=true"
      - "traefik.http.middlewares.secure-headers.headers.contentTypeNosniff=true"
      - "traefik.http.middlewares.secure-headers.headers.forceSTSHeader=true"
      - "traefik.http.routers.openwebui.middlewares=secure-headers"

# -------------------------------------
# Networks & Volumes
# -------------------------------------
networks:
  ai-net:
    driver: bridge     # Secure internal layer
  proxy-net:
    driver: bridge     # External ingress layer

volumes:
  ollama_data:
  open_webui_data:
Why this architecture matters
Running raw docker run commands works for a quick demo, but breaks down on a permanent homelab server. Here is why we structured the docker-compose.yml this way:
- Air-gapped LLM API: Ollama is bound exclusively to the internal
ai-netbridge. There are zero exposed host ports. The only way to talk to the model is through the Open WebUI container over the isolated network. - Dynamic Ingress with Traefik: Instead of statically binding host ports, Traefik acts as a smart reverse proxy. It routes inbound traffic on ports 80/443 directly to Open WebUI using Docker labels, forces automatic HTTPS redirection, and injects strict security headers (
browserXssFilter,contentTypeNosniff). - The “Memory Backoff” Trap: Because the APU shares system RAM, the Vulkan driver imposes a strict limit on single memory allocations. If you try to load a model that is too large, the GPU fails the initial allocation and “backs off,” dumping those layers onto the CPU. If you see 0% GPU usage during inference, this is why. By bumping the LXC and Ollama memory limit up (in our case, to 48GB), we provide the necessary headroom for the Vulkan buffer.
- The
latestvsrocmTag: Many AMD users defensively pull therocmimage tag. Do not do this for APUs. On a Ryzen APU, the ROCm abstraction often fails to initialize the integrated graphics and silently falls back to CPU execution. For APU Vulkan acceleration, thelatestimage simply works. - Principle of Least Privilege: We stripped every unnecessary Linux root capability from the Open WebUI container (
cap_drop: ALL). If an exploit surfaces in the frontend, the blast radius is confined. - Solving the 500 Error Crash: Normally, Open WebUI boots faster than Ollama can initialize the AMD GPU drivers. When the UI tries to connect and fails, it throws a permanent
500: Internal Errorcrash. We fixed this by building a nativeCMD ollama listhealth check that probes the API. Traefik and WebUI structurally wait for Ollama to becomehealthybefore attempting connection.
3. Deploy the Stack
Spin up the entire environment in the background:
1
docker compose up -d
4. Verify Hardware Acceleration
Verify Ollama detects the AMD graphics before downloading any multi-gigabyte models.
1
docker logs ollama | grep "AMD"
Expected output: ggml_vulkan: Found AMD Radeon Graphics
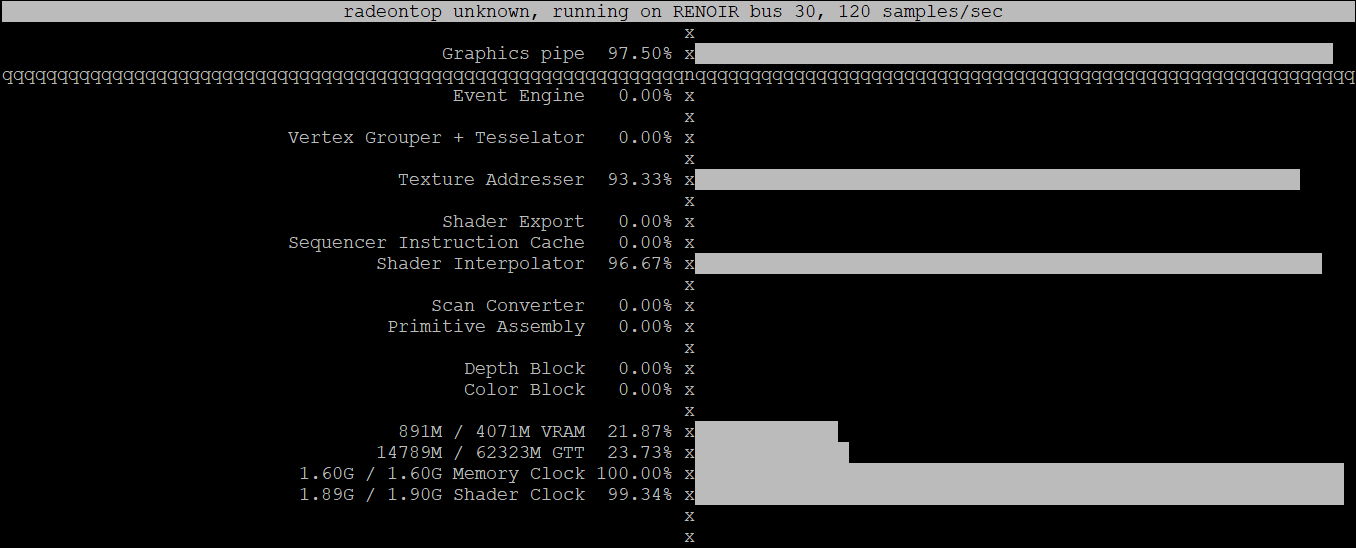
Bonus: How to Monitor GPU Usage (radeontop)
If you run inferences via CLI, you can monitor APU metrics in real-time using radeontop, an AMD alternative to nvidia-smi.
Since you configured the container to access /dev/dri, you can run this directly from inside the LXC environment.
First, install the utility:
1
apt install -y radeontop
Next, simply launch it to view rendering activity, VRAM allocations, and shader clock speeds:
1
radeontop
When you generate a response in Open WebUI, the Graphics pipe utilization briefly spikes to 100% as the GPU processes tokens.
The Final Result
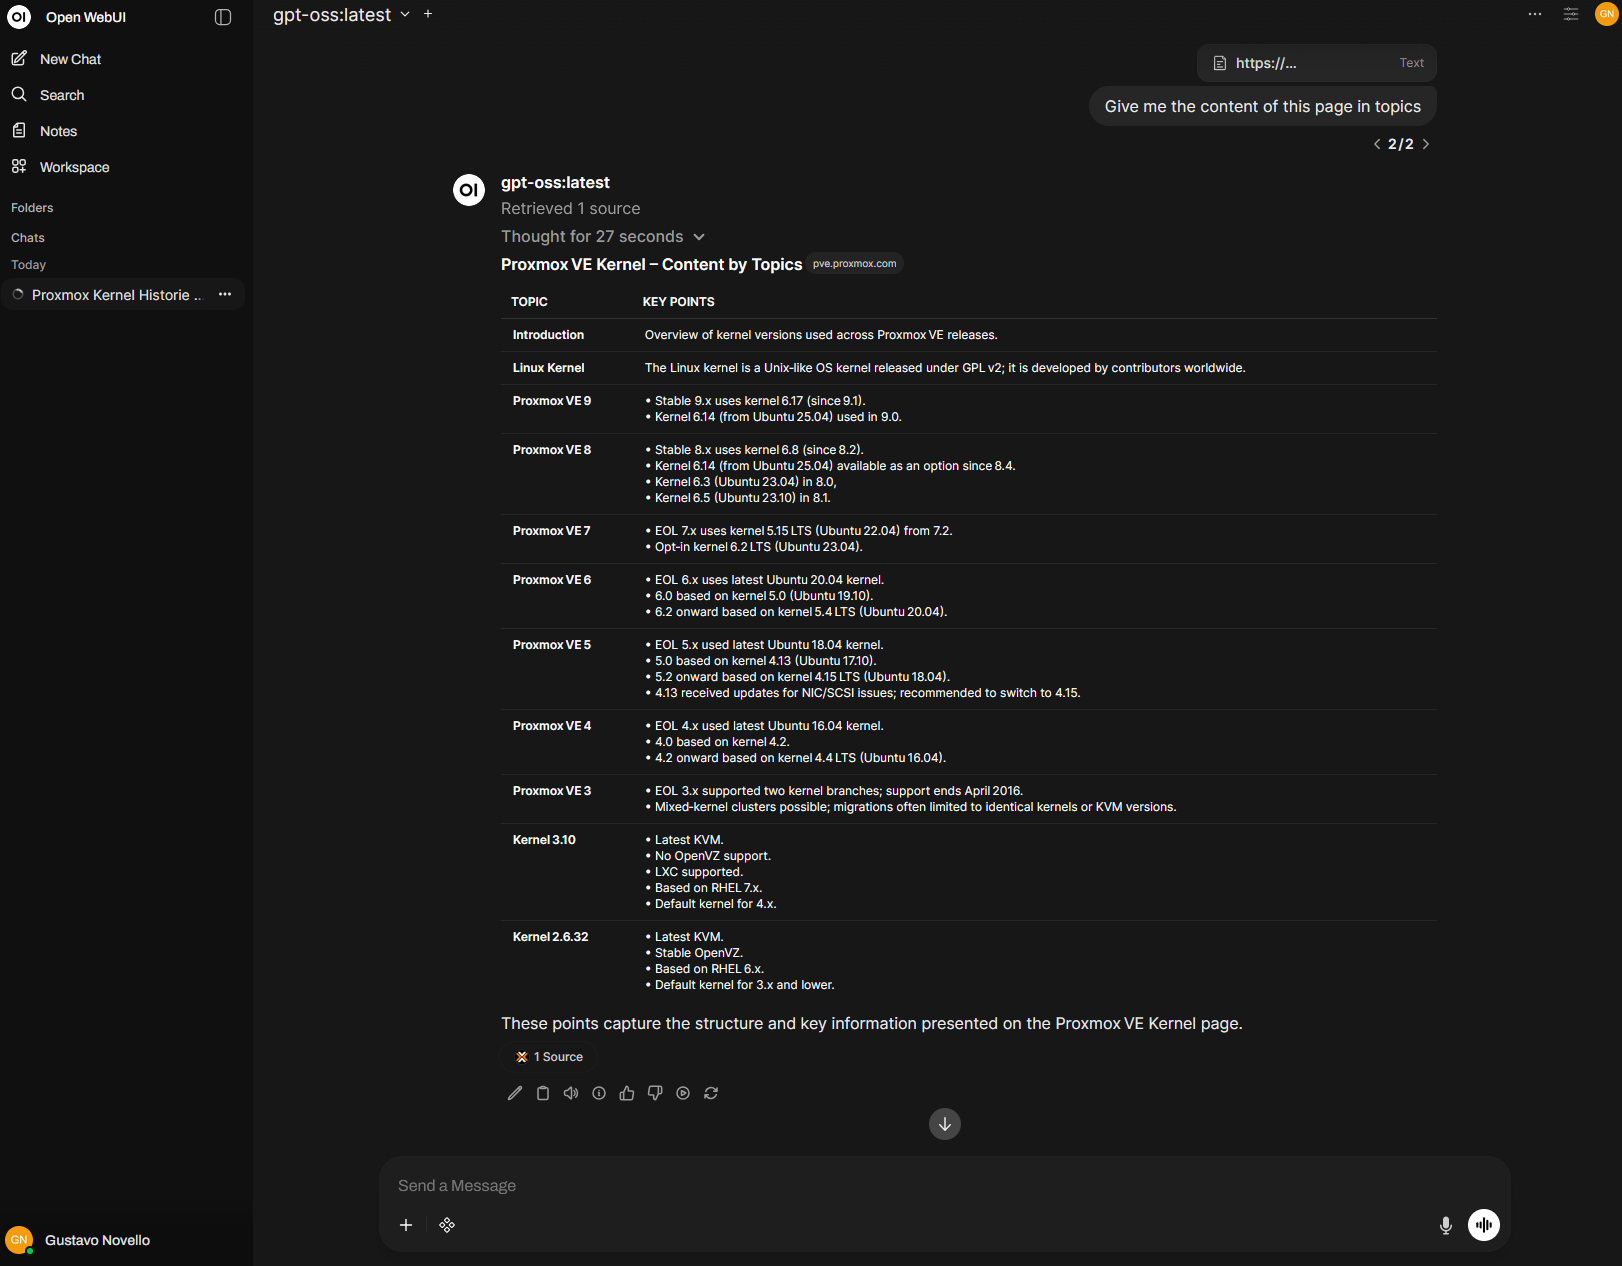
Once it’s running, you have a local, private AI environment. Hardware acceleration makes tasks like summarizing full articles fast.
Accessing Open WebUI
You can access the web interface by navigating to https://10.1.99.16 (or whatever IP you assigned to your LXC container) in your browser. Since Traefik handles the routing, it automatically answers on port 443 with a self-signed certificate.
Here is Open WebUI summarizing a link using the APU: