ZTP ESXi installation
A easy way to automate ESXi installation on large scale
ZTP ESXi installation
Requirements
- Linux machine (I’m using WSL running ubuntu 24.04 in this example)
- ESXi 8.0U3 ISO (it should work in older versions, but some parameters may be different)
Key objectives
- Spin up a temporary HTTP server that you can use in field for mass ESXi deployment
- Create a custom ESXi ISO file with boot.cfg edited to read ks.cfg from a HTTP server
- Explain the logic behin my scripts
The custom ISO
Edit the BOOT.CFG
Download the latest ESXi ISO from Broadcom portal here
Mount that ISO file into your system and copy the content of the ISO to a directory inside of your linux machine (in my case is /home/novello/ESXi8/)
Once you have those files on a directory, is time to edit the file BOOT.CFG, responsible for specifying where is the kickstart file
1
vi /home/novello/ESXi8/EFI/BOOT/BOOT.CFG
and
1
vi /home/novello/ESXi8/BOOT.CFG
- Edited lines:
timeout: Removed the splash screen to skip the “loading” screen.kernelopt: Added the path to theks.cfgfile hosted on the web server.
1
2
3
4
5
6
7
8
9
bootstate=0
title=Loading ESXi installer
timeout=0 # Here I removed the timeout to not show the "loading" screen
prefix=
kernel=/b.b00
kernelopt=runweasel ks=http://192.168.100.32:8000/ks.cfg # Here I added the ks.cfg file to the boot options, loaded from a web server
modules=/jumpstrt.gz --- /useropts.gz --- /features.gz --- /k.b00 --- /uc_intel.b00 --- /uc_amd.b00 --- /uc_hygon.b00 --- /procfs.b00 --- /vmx.v00 --- /vim.v00 --- /tpm.v00 --- /sb.v00 --- /s.v00 --- /atlantic.v00 --- /bcm_mpi3.v00 --- /bnxtnet.v00 --- /bnxtroce.v00 --- /brcmfcoe.v00 --- /cndi_igc.v00 --- /dwi2c.v00 --- /elxiscsi.v00 --- /elxnet.v00 --- /i40en.v00 --- /iavmd.v00 --- /icen.v00 --- /igbn.v00 --- /intelgpi.v00 --- /ionic_cl.v00 --- /ionic_en.v00 --- /irdman.v00 --- /iser.v00 --- /ixgben.v00 --- /lpfc.v00 --- /lpnic.v00 --- /lsi_mr3.v00 --- /lsi_msgp.v00 --- /lsi_msgp.v01 --- /lsi_msgp.v02 --- /mtip32xx.v00 --- /ne1000.v00 --- /nenic.v00 --- /nfnic.v00 --- /nhpsa.v00 --- /nipmi.v00 --- /nmlx5_cc.v00 --- /nmlx5_co.v00 --- /nmlx5_rd.v00 --- /ntg3.v00 --- /nvme_pci.v00 --- /nvmerdma.v00 --- /nvmetcp.v00 --- /nvmxnet3.v00 --- /nvmxnet3.v01 --- /pvscsi.v00 --- /qcnic.v00 --- /qedentv.v00 --- /qedrntv.v00 --- /qfle3.v00 --- /qfle3f.v00 --- /qfle3i.v00 --- /qflge.v00 --- /rdmahl.v00 --- /rste.v00 --- /sfvmk.v00 --- /smartpqi.v00 --- /vmkata.v00 --- /vmksdhci.v00 --- /vmkusb.v00 --- /vmw_ahci.v00 --- /bmcal.v00 --- /clusters.v00 --- /crx.v00 --- /drivervm.v00 --- /elx_esx_.v00 --- /btldr.v00 --- /dvfilter.v00 --- /esx_ui.v00 --- /esxupdt.v00 --- /tpmesxup.v00 --- /weaselin.v00 --- /esxio_co.v00 --- /infravis.v00 --- /loadesx.v00 --- /lsuv2_hp.v00 --- /lsuv2_in.v00 --- /lsuv2_ls.v00 --- /lsuv2_nv.v00 --- /lsuv2_oe.v00 --- /lsuv2_oe.v01 --- /lsuv2_sm.v00 --- /native_m.v00 --- /qlnative.v00 --- /trx.v00 --- /vcls_pod.v00 --- /vdfs.v00 --- /vds_vsip.v00 --- /vmware_e.v00 --- /hbrsrv.v00 --- /vsan.v00 --- /vsanheal.v00 --- /vsanmgmt.v00 --- /tools.t00 --- /xorg.v00 --- /gc.v00 --- /imgdb.tgz --- /basemisc.tgz --- /resvibs.tgz --- /esxiodpt.tgz --- /imgpayld.tgz
build=8.0.3-0.0.24022510
updated=0
Compile the new files into a new custom ISO
Here’s where the magic happens, how do we compile all those previous extracted files into a new custom .ISO? Simple!
Parameters you need to change:
-o: Path/name of the file you want to save. In this example/home/novello/ESXi8U3_custom.iso- Path where the ISO was extracted, in my case
/home/novello/ESXi8
1
genisoimage -relaxed-filenames -J -R -o /home/novello/ESXi8U3_custom.iso -b ISOLINUX.BIN -c BOOT.CAT -no-emul-boot -boot-load-size 4 -boot-info-table -eltorito-alt-boot -e EFIBOOT.IMG -no-emul-boot /home/novello/ESXi8
ks.cfg (where the magic really happens)
- Okay, so in the BOOT.CFG I informed that when the host boots up, it should read a kickstart file and use the logic in there to start configuring the ESXi.
Key objectives ks.cfg
- Load ESXi installation and accept the EULA
- Define root password
- Grab initial IP using vmnic0 and DHCP
- Enable SSH/Bash shell
- Executes python script that will configure definitive IP / Hostname on the host
1
2
3
4
5
6
7
8
9
10
11
12
13
14
15
16
17
18
19
20
21
22
23
24
25
26
27
28
29
30
31
32
33
vmaccepteula
rootpw VMware123!
install --firstdisk --overwritevmfs
network --bootproto=dhcp --device=vmnic0
reboot

%firstboot --interpreter=busybox

# Wait for the network to start
sleep 5

# Enable SSH and ESXi Shell
vim-cmd hostsvc/enable_ssh
vim-cmd hostsvc/start_ssh
vim-cmd hostsvc/enable_esx_shell
vim-cmd hostsvc/start_esx_shell

# Suppress ESXi Shell warning
esxcli system settings advanced set -o /UserVars/SuppressShellWarning -i 1

# Adjust the time zone
cp /usr/share/zoneinfo/America/Sao_Paulo /etc/localtime

# Download the host_config.py script and macs.csv file
wget http://192.168.100.32:8000/host_config.py -O /tmp/host_config.py
wget http://192.168.100.32:8000/macs.csv -O /tmp/macs.csv

# Make the script executable
# (Note: The script is already executable in the original code, but this is a good practice)
chmod u+x /tmp/host_config.py

# Run the host_config.py script
/bin/python3 /tmp/host_config.py
Key objectives of host_config.py
- Python reads the macs.csv
- Based on the MAC address of vmnic0 it determines which IP/mask/gw/VLAN/hostname vmk0(management) will be configured
1
2
3
4
5
6
7
8
9
10
11
12
13
14
15
16
17
18
19
20
21
22
23
24
25
26
27
28
29
30
31
32
33
34
35
36
37
import os
import csv
import subprocess

CSVPATH = "/tmp/macs.csv"  # Path to the CSV file

# Get the MAC address of the host interfaces
MAC = subprocess.check_output(
    "esxcli network ip interface list | grep 'MAC Address' | awk '{print $3}'",
    shell=True
)

MACADDR = MAC.split()
print("MACs found:")
print(MACADDR)

# Read the CSV file and find the matching MAC address
with open(CSVPATH, 'r') as csvFile:
    csvReader = csv.reader(csvFile)
    next(csvReader)  # Skip the header row

    for csvRow in csvReader:
        # csvRow format: hostname,mac,ip,netmask,gateway,vlan
        if MACADDR[0].decode('utf-8').lower() == csvRow[1].lower():
            hostname = csvRow[0]
            ip = csvRow[2]
            netmask = csvRow[3]
            gateway = csvRow[4]
            vlan = csvRow[5]

            print(f"Configuring host {hostname} with IP {ip}")

            os.system(f"esxcli system hostname set --fqdn={hostname}")
            os.system(f"esxcli network ip interface ipv4 set --interface-name=vmk0 --ipv4={ip} --netmask={netmask} --type=static")
            os.system(f"esxcfg-route {gateway}")
            os.system(f"esxcfg-vswitch -p 'Management Network' -v {vlan} vSwitch0")
What macs.csv looks like
1
2
3
  hostname,mac,ip,netmask,gateway,vlan
  esxi01,00:50:56:11:22:33,10.1.99.101,255.255.255.0,10.1.99.1,99
  esxi02,00:50:56:44:55:66,10.1.99.102,255.255.255.0,10.1.99.1,99
Spin up the HTTP server
- I will use the same WSL instance I used to compile the ISO to serve as HTTP server
- I created a separate folder that will contain
ks.cfgmacs.csvandhost_config.py
1
2
3

python3 -m http.server -d /home/novello/http
- On your browser, navigate to
http://<WSL_instance_IP>:8000, you should see something similar to
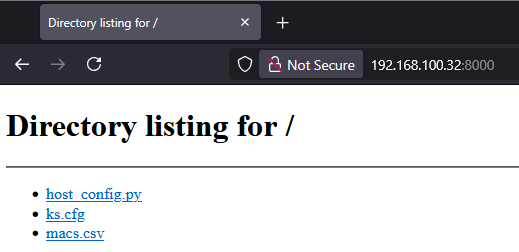
And that’s all, we’re ready to start our ESXi installation and it should configure the basics for us automatically.
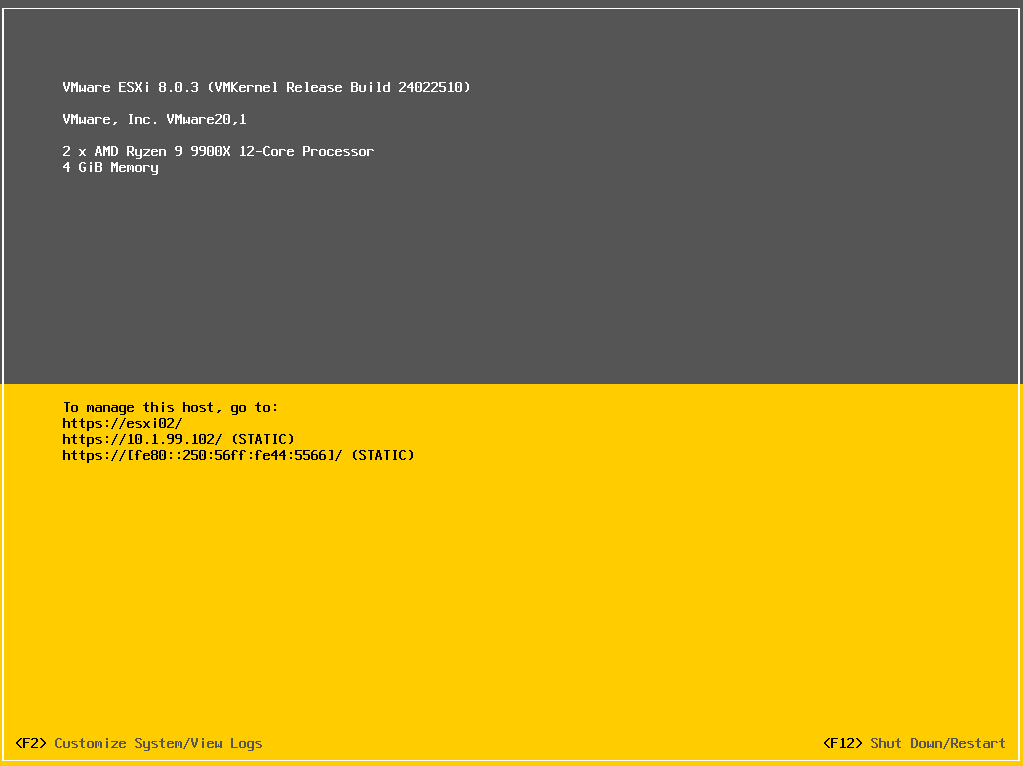
Installed
- For testing purposes I created a VM into VMware workstation and customized the MAC address to match
esxi02of ourmacs.csv
References
This post is licensed under CC BY 4.0 by the author.